Feeds:
Posts
Comments

HOMEMADE PLAY DOUGH

Homemade Play Dough:

IMG_5857 copy

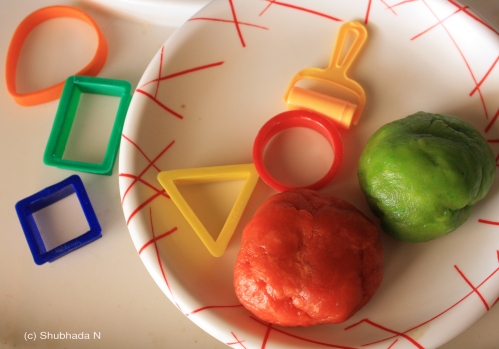
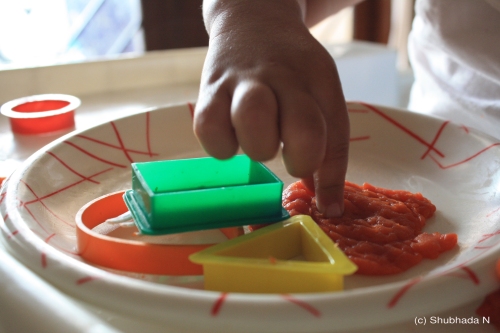
Mira is 2 and half years old now.Time flies, yes it does:)..She has started making sentences in her own gibberish ways, which only I can understand. She loves reading, solving puzzles, listening to music, coloring and screaming of course:)..She’s more of a indoor games person and loves to do activities at home. It’s fun watching her grow and of course there are some panic moments:). She still hasn’t overcome her habit of putting things in her mouth. Give her any object and she’ll first try it by tasting it. We are always on high alert when we give her activities like coloring or stringing beads. This situation prompted me to look for activities which require home made stuff , so that they are safe for her. Our latest introduction to activities list is the play dough. I tried giving her the store bought play dough and I knew that it would first go in her mouth and she did!!..sigh! Out went the store bought play dough.

I spent quite some time researching on web on how to make edible(can be put into the mouth and not meant to be eaten per se) play dough which is safe and prepared with ingredients present at home. I particularly liked this recipe which was mentioned in Redtedart. This requires just 3 basic ingredients and color is optional.Children love playing with colors so adding edible food color is a good way to get them to play.I tried tasting the dough and not a great dough to taste, so I’m sure she’ll be forced to just play with it and not taste it. I also found out that this is also an excellent way to teach them colors. Mira now asks me for red dough or green one as these are the colors she just got introduced to.

Try making small quantities of different colored doughs and you can also add some  edible glitter. Go ahead and have fun making colorful wonders. Another important point to remember is if you stay in a place which is hot and humid, please store the dough in an airtight container in the fridge to prevent fungus growing on it. The salt added in the dough is meant to prevent fungal growth.

You’ll need:

All purpose flour(maida): 1 cup

Vegetable oil: 1/2 cup (actual recipe asked for 1 cup, have reduced to half)

Salt: 1/2 teaspn

Water

Food color of your choice: I have used red and green.

Procedure:

Heat some water in a container and mix the required amount of color to it. In a bowl mix maida, vegetable oil, salt and rub the mix with your hands. Salt is added to prevent fungus growth and the dough has a longer shelf life. I did not want to take the risk so I store the dough in an airtight container and keep it in the fridge.To the above mix, keep adding the color mixed water little by little and keep kneading. This is a bit of an exercise for your arms as you have to keep kneading till the dough is very soft, just like store bought play dough.

Lo and galore the play dough is ready for your child’s creativity. Have fun with your little one. Mine loves rolling chapattis and making dosas with the dough:)..
IMG_5877 copy

Teething Biscuits

Teething Biscuits:

Every mother goes through a tough time when her child is teething. I’m sure we all want to do something so that the child gets relieved of the gnawing pain. My baby is currently going through this problem and it often aggravates in the evening. I feel very helpless and she gets very clingy. Teethers are one sure shot way to relieve pain, but my baby got fed up of store bought teethers. I have tried using teethers kept in the fridge etc, but she just doesn’t want to chew on them. This was when I go to thinking that probably I need to try out teethers made at home. I had read about them on this site and yes it did work wonders for me. I guess the fruit flavor added to it does make a difference as opposed to chewing plastic chewies.

Warning: Please be careful when you give the child teething biscuits as the biscuits get soggy on repetitive chewing and the child might swallow a huge chunk and may choke. Teething biscuits should be given only under parental supervision.

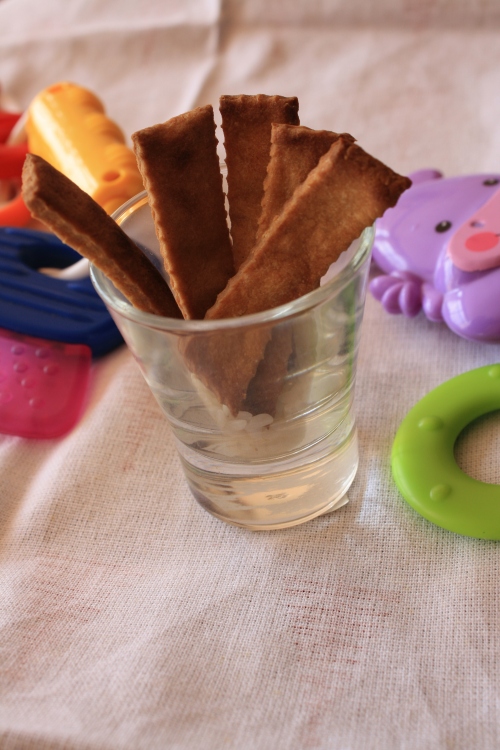
The original recipe had apple flavour to it, I’ve tried another recipe by adding a new flavour of banana and nutmeg to the biscuits. my baby loves only one fruit and that is banana hence the choice of fruit:), though I have mentioned both the options.

IMG_4722

Teething biscuits (apple flavour)

You’ll need:

Roasted rice powder/flour: 2 tbspn

Roasted Whole wheat powder: 3 tbspn

Cold apple juice: 4 tbspn

Ghee(clarified butter): 1 teaspn and a little for greasing the tray

Procedure:

Preheat the oven to 160 deg C.

Dry roast rice flour and whole wheat flour separately till you get a light aroma. Mix both the flour and add apple juice spoon by spoon to make a soft dough. You can add more juice if the dough is tight to make it soft. Roll the dough on a platform to 1/4th inch thickness, I rolled it a little thinner and that explains why I kept the biscuits to bake only for 15 mins as opposed to 25 mins as mentioned in the original recipe.

Once the dough is rolled on the platform, take a cutter and make 1/2 inch long stripes. In a greased tray line the pieces and bake them to 160 deg C for 15 mins. Please check your oven settings. Let them cool and they will turn out to be real hard which the baby can chew on but cannot bite.

Teething biscuits are ready.

Teething biscuits (Banana nutmeg flavour)

You’ll need:

Roasted rice powder/flour: 2 tbspn

Roasted Whole wheat powder: 3 tbspn

Overripe Banana (the smaller variety-yellaki): about an inch or half the banana

Nutmeg powder: a pinch

Ghee(clarified butter): 1 teaspn and a little for greasing the tray

The procedure remains the same as above. Hope your baby likes them:).

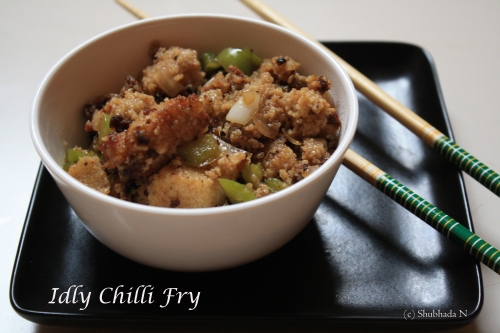
Idly Chilli Fry:

This recipe is very nostalgic for me as it reminds me of my good old carefree days  in Goa. Panaji, those days had very few restaurants which served veg/south indian food..Kamat was a hot favourite for masala dosa,south indian thali.. Then there was Navtara and Sanyog and the relatively new Shiv Sagar.

Now that I’m in the heartland of veg/south indian food, Bangalore, I crave for Goan vegetarian food. I make it a point to visit cafe Tato (my all time favourite) and cafe Bhonsale whenever I visit Panaji. How I miss the usal pav, chole pav and misal there. Times change, is all I can say…

Idli chilli fry was the delicacy I first tasted in Shiv Sagar and I just couldn’t stop myself from ordering  it everytime I visited them.I found this recipe an excellent way to get rid of leftover idlis.The word leftover here means, you have extra idlis and you neither have the time nor the inclination to make chutney. We also have a south indian version to get rid of them:)..but with the chinese way there was not a crumb left on our plates:)..This also works as a yummy evening snack.

idli chilli fry

So here’s the recipe:(serves 2)

Leftover idlis: 4-5 nos (chopped into large size or diced)

Capsicum: 1/2 diced into square pieces

Onion: 1 medium size diced into square pieces

ginger garlic paste: 1/2 teaspoon

soy sauce: 1.5 teaspoon ( you can add more if u like it tangier)

green chilli sauce: 1 teaspoon

red chilli sauce: 1 teaspn

corn flour: 1 teaspn mixed in 1/4 cup water

salt to taste

sugar: 1/2 teaspn

oil: to fry idlis

You can also add spring onions, carrots julienned, cabbage etc.

Procedure:

In a wok, pour some oil and fry the idlis. the idlis need not be deep fried, though the restaurant variety has deep fried idlis. Once fried, you can remove the excess oil from the wok and save about a tablespoon to make the dish.

Add onions, capsicum to the wok and saute them. Once done, add ginger garlic paste, soy sauce, red and green chilli sauce, salt, sugar, corn flour mix and give it a good stir. Allow it to cook for 2-3 minutes, tip in the fried idli pieces in to the wok and give it a nice stir. You can turn off the gas once the dish is cooked for 2-3 minutes more. This dish needs to be savoured when hot with some sauce if required. What’s really nice about the idlis here is that they are nice and crispy on the outside and soft as cotton on the insides..

Enjoy.


Like every new mother, I too had a lot of apprehensions and many new experiences.

These are few tips put together after figuring out the hard way. I thought it may help a lot of new moms like me.

Before I start of, I would like to give a small overview about my child. I’m blessed with a daughter ‘our li’l angel’, who is 7 month old now. She has been a peaceful and a friendly child till date, though there have been a few problems we faced with her just like any other child:).

One of the first problems we faced after her birth was she did not latch on for breast feeding no matter how much I tried. I even tried taking help from lactation experts but she just refused. As a result she was put on bottle feed. I used to express milk till 3 months and then she was put on formula milk. Formula milk has it’s own drawback, main one being colic. My daughter slept throughout the entire day and used to wake up twice for feeds during the night. Her sleep and feed timings were quite predictable right from the start.

These tips have worked for me, each case is different as each child is..so trust your instincts and you’ll definitely find a way out.. I figured out ways to work around her comfort level and now we are 7 months old:)…

Feeding tips:

These tips are essentially for a bottle fed baby.

1. For expressing breast milk, always buy a battery operated or electrically operated good quality breast pump. Manual ones are not very easy to operate and can exhaust you. You may lose the inclination to express.

2. If the baby is bottle fed, try feeding the baby in sitting position right from day ‘1’. This will solve a lot of problem relating to colic and is also easy to burp the baby after feed. This position is also a blessing when you start with solids.

3.When you plan to invest in a thermos flask, I felt it was better to buy 2 sizes viz.1 liter and 1/2 liter. 1 liter flask for home and 1.5 liter for travel within city limits say visit to Doctor or restaurant etc.

4. When you start with feeding solids, practice feeding the baby in sitting position. I use the sitting position of the pram. Sit and feed at the baby’s level. This is non messy and easy to gauge the child’s appetite.

5. Try feeding solids during the day time as any allergy or discomfort can be dealt with by visiting the Paediatrician. Start with smaller quantities and then gradually increase as per the baby’s appetite.

6. Try one type of fruit, vegetable for an entire week and then start with a new one. this makes it easy to notice any allergies caused by a particular type of solid.

Tips on furniture:

1. I feel the rocking chair model from ‘Fischer Price’ is a blessing. It has helped my daughter to be on her own (like sit in the kitchen when I’m cooking). It can be used till 2 years of age and has 3 positions (sleeping, sitting with an incline and sitting upright) and can be carried easily. It is also an excellent way to keep the baby in an upright position after feed. The chair helped us a lot when she had a bad cold and chest congestion, she found it easy to breathe on this chair.

20120817_114617

2. If you have less storage space, a space saving option to store medicines, toiletries, nappy, diapers used everyday would be to attach small baskets with channels under your bed. This would make it easy to access even in the night.

IMG_4698 IMG_4699

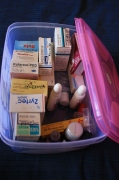
3.To store medicines, buy a big transparent plastic box. name all the medicines with the illness it is used for on top so that you can easily locate a medicine when in need or emergency. It could also help your care taker too in your absence.

IMG_4700 IMG_4701

4. It is always better to pick up heat indicating spoons. They are very helpful when you feed soup, khichdi etc which would generally be fed warm.

BPNUB00019_1

5. When planning to buy sippers at a later stage, better to go for teh ones where the spout is removable and can be sterlised. I’ve gone in for a Philips Avent one. There are various sizes available depending on the age of the baby with spouts ranging from soft to hard. I picked up a slightly bigger sipper with soft and hard spouts. This way you can reduce on buying number of botttles as babies outgrow them within 2 months.

BPAVE00087_1

Sleeping tips:

1. I researched a lot by asking friends etc on whether to invest in  a separate cot for my baby. Each had a different view point some felt it would not help and would be just another piece of furniture while some felt it would be better as the child has her own space. In our case we went ahead and invested in one as our bed was too small to occupy a baby.  The separate cot option has helped me a lot as she can comfortably sleep without feeling crammed. The bed has barricades on all 4 sides, so  when I have to leave her unattended for bath etc. I know she’ll be safe there. One of the barricades can be let down and the cot gets attached to our bed. We bought the cot from a friend who has increased the height of the barricade on one side so that the baby doesn’t jump off when she starts to stand up.

2. Always (mind you always) maintain your baby’s sleeping routine. Try and start it from day ‘1’ of birth. Whether your baby is sleepy or not, take her to her cot, switch off all the lights, with a soft night light, sing to her or sway her so that she knows its sleep time. it’ll take a while but hang in there it’ll work wonders and give you some ‘me’ time after she sleeps. This has worked for me up till now (fingers crossed and touchwood!!)

I’m sure every mother has loads of tips to contribute..Like I said before each child is different. I’ll be posting tips regularly as and when I find something has really helped me..All the best and enjoy the beautiful relationship with your little one.

Puran Poli:

Mira is taking most of my time these days and it amazes me as to how soon time can fly..Mira is 7 month old now, she’s babling a lot and tries to move forward. In our custom we celebrate every milestone a child attains by preparing some sweet dish. Milestones could be eleventh day after birth, rolling on to the tummy, first meal or anna prashan etc.Last month, Mira started crawling  and to celebrate this milestone, I decided to make Puran Poli..I made puran polis for the first time under my mum’s guidance. I’ve been learning a lot of things from mum as she’s with me post delivery and helping me take care of my baby..I guess this has been the only time in my life where I’ve been at home for such along time and also made time to learn a lot of things to cook from mum..I’ll be posting my endeavor as and when my daughter permits me to.

Puran Poli is traditionally a Maharashtrian sweet dish and also widely made in Karnataka. In kannada we refer to it as Bele Obbattu or Bele Holige. There are variety of ways people make puran poli, some use maida (APF) or semolina to make the dough. This recipe is my mum’s way of doing bele obbattu and we have used whole wheat flour to make the dough.

IMG_4583

For Puran:

Chana dal (split bengal grams): 1 cup

Jaggery: 1 cup

Cardamom: 2 pods (powdered)

For Poli:

Atta (whole wheat flour): 1 cup

Maida (APF): 1 tbspn

salt: to taste

Turmeric: 1/2 teaspn

water: to make the dough

Oil for making polis.

Procedure:

To make Puran (Stuffing):

Pressure cook chana dal with enough water. Let the dal get cooked nicely and then strain the remaining water from the pressure cooked dal. Strain it completely without leaving any water and keep this water aside. You can discard this water or use it to make special variety of saaru(rasam) which we refer as ‘Kattina Saaru’..This kind of rasam is generally prepared on festivals.

In a kadai, add the pressure cooked chana dal along with jaggery and keep cooking it on a mild flame. Make sure you keep stirring the mix continuously to avoid the jaggery from burning. You can switch of the gas once this mix becomes homogeneous and all the water has got evaporated. The consistency of the stuffing should be such that one should be able to make small laddus with it. Switch off the gas and add cardamom powder.

To make the Dough:

Mix whole wheat flour, maida, turmeric and salt and pour water to make a soft pliable dough. The dough needs to be kept aside for an hour atleast to get soft polis. You can also keep it for a longer time to get even softer polis.

To make Puran Poli:

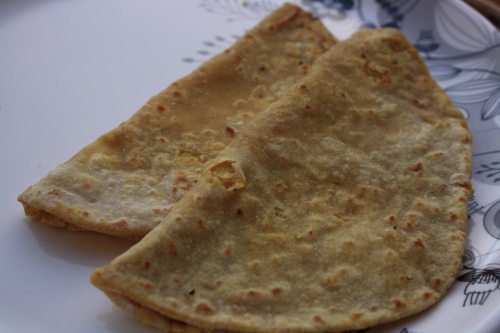
Make small balls or pedas with the dough. On another plate, make small laddus of puran. Roll the small ball of dough into a small puri shape. Keep the puran ball in the centre of the puri and gather all the ends and join in the centre to make a potli out of it. Seal the potli well so that the puran doesn’t come out in the process of rolling. Roll the stuffed potli with the help of little maida applied on the platform in the shape of a chappati. Apply some oil on either side of the poli and fry on a frying pan. Puran polis need to be eaten hot with a generous amount of ghee (clarified butter) on it. If the polis are a day old you can crumble the polis and add milk to it to make another amazing sweet dish.

Its quite sad that Mira couldn’t relish the dish, but we scrumptiously did on her behalf:)..Will definitely make for her when she starts eating:)..enjoy.

   IMG_0635

   These days I can think of nothing but ‘My Daughter’ who is 5 months old. She’s turning out to be quite a brat. My life revolves around her and she leaves no stones unturned in making me dance to her tunes. Nevertheless we all at home love to dance to her tunes, love all the giggles and gurgles and yes, she definitely keeps us on our toes all the time. I can’t imagine my life without her.

My most contemplative time with her is when I’m putting her to bed in the night and there’s complete silence around. This is the time when all my thoughts surge through my mind. This thought on spirituality struck me when I was trying to put her to bed. I was tired and all I wanted to do was, crash on my bed. Putting her to sleep is quite an effort and after a while I managed to put her to sleep. I was sitting there staring at her innocent face and just then I saw her smile in her sleep. Her smile made me smile too.. Her smile had such a magical effect, I could feel all my muscles relax and it felt so serene. I forgot all my exhaustion, forgot all my worries about tomorrow. I was filled with this sudden sense of peace, Inner peace.  I had never experienced this feeling at all, either always being caught up at work or at home.

IMG_0688

I had read a book by Paulo Coelho , my favorite author, sometime back and this is what he wrote “In love lies the seed of our growth. The more we love, the closer we are to the spiritual experience .” I guess this is what he was talking about. I loved the quote and now I understand the meaning…the meaning of feeling spiritual. The definition of spirituality differs according to people. I have always been the soul searching types and have always been seeking for answers. For me Spirituality is being happy, it is finding my inner peace. It is a feeling of forgetting myself and just being in the moment…To my surprise I’ve been able to experience all these feeling from the time I’ve become a ‘Mother’. From the time my daughter has arrived in my life, I’ve forgotten myself, forgotten ‘I’ and I’m very happy about it:)..

Coming to think of it, no body teaches you to be a Mother, it’s instinctive and intuitive. There are no guidelines and no rulebook works. We, as mothers don’t seek any approvals and as a result always feel positive and good about ourselves. Above all, the child makes you feel so important that you forget all your complexes. We don’t need a Guru or climb Himalayas to seek for answers..it’s all there in the eyes of a child:).. Here’s to all the Mothers out there who bring up their children with love very unconditionally, kudos to you guys..Hang in there, I know that the ladder to Nirvana is a little tall, but you definitely will get there someday.

DSCN4011

JOYS OF MOTHERHOOD

I’ve been on a sabbatical for almost a year now and finally I now find some time to pin myself down and do what I love doing the most…blogging.

Well, I take this moment to proudly announce the arrival of our cute li’l angel, our daughter ‘Mira’. She happened to arrive on the Krishna Janmashtami day and hence we decided to name her ‘Mira’ meaning ‘Princess’ and also named after the great Krishna devotee ‘ Meera’..

From the time she has arrived into my life, Change is the only thing that has been a Constant. All of a sudden my life has taken off on a tangent. There’s only one person around whom my whole life now revolves-my daughter..Amidst all the nonstop nappy changing, sleepless nights, disturbed schedules- Chaotic Life is Beautiful. There’s this sudden  change in perspective; untidiness doesn’t matter at all, being late for appointments is okay, dressing sense gone for a toss is understandable, this is something new to me..In all these changes I see a smile of my beautiful child and forget everything, forget being a perfectionist, forget being punctual or for that matter even my OCD has taken a backseat, good for me..

She’s such a beautiful child who has given me so much happiness. She has made me understand the meaning of ‘unconditional love’. No matter how tired I feel or how bad my day has been, just a smile on her face brightens me up and refreshes me. She even makes me feel like I’m Celine Dion or Lata Mangeshkar as she loves all the songs I croon to her and she hums along with me. Her coos and aahs make me feel that she’s listening very attentively to whatever I’m saying all the time..She makes me feel like a Superwoman who can protect her, be it from the loud noise of bursting crackers during diwali or bad dreams..She makes me feel like I’m the most indispensable person in the world..

Coming to think of it, there’s so much that I can learn from her. I have learnt by just observing her-never give up ,keep trying no matter what, to forget pain easily(one sweet medicine and she forgets that she has had a shot:), to love everyone and to be persistent, which I feel  really works in this world:).. She such a bundle of energy , her nonstop exercise of swaying her legs and hands in the air makes me wonder as to where does she get so much energy from, I need to go there..being a mother i can go on and on:)..

Of all the relationships that I share, being a ‘MOTHER’ has been the most fulfilling of them all, something which needs to be experienced and cannot be explained.

This is my favorite Piece from Kahlil Gibran’s ‘The Prophet’, which I keep reading time and again. I keeping reminding myself..

And a woman who held a babe against her bosom said, “Speak to us of Children.”
And he said:
Your children are not your children.
They are the sons and daughters of Life’s longing for itself.
They come through you but not from you,
And though they are with you, yet they belong not to you.
You may give them your love but not your thoughts.
For they have their own thoughts.
You may house their bodies but not their souls,
For their souls dwell in the house of tomorrow, which you cannot visit, not even in your dreams.
You may strive to be like them, but seek not to make them like you.
For life goes not backward nor tarries with yesterday.
You are the bows from which your children as living arrows are sent forth.
The archer sees the mark upon the path of the infinite, and He bends you with His might that His arrows may go swift and far.
Let your bending in the archer’s hand be for gladness;
For even as he loves the arrow that flies, so He loves also the bow that is stable.

Navratri Celebrations:

‘Navratri’ as the name suggests means ‘Nine Nights’..Nine nights is actually a festival in the honour of Goddess Shakti. It’s a special occasion for all Hindus all over India. The first three nights are dedicated to Goddess Durga, the next three nights are dedicated to Goddess Laxmi and the  last three nights are dedicated to Goddess Saraswati. Navratri generally ends with Vijaya dashmi or Dussera.

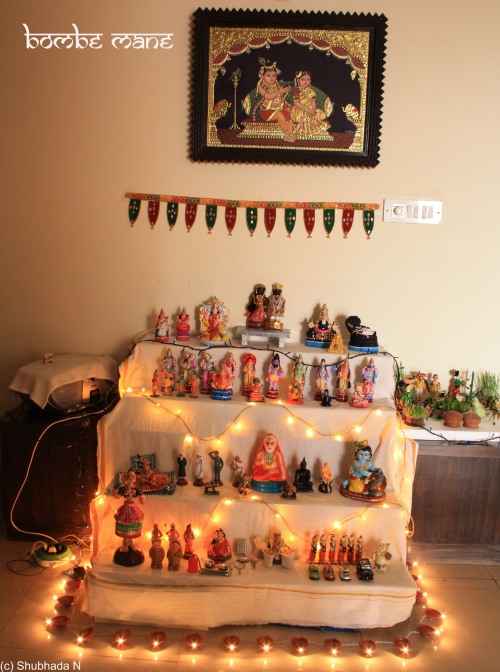
For us South Indians, Navratri is synonymous to Golus or Bombe mane (Doll House), sundals, Badam Milk and chanting of various Devi sthotras. You’ll generally hear M.S. Subbu’s chantings in every house this time of the year. This season is very dear to me as I actually relive my childhood by collecting and displaying lovely dolls:).. I keep collecting different types of dolls and knick knacks to display for Navratri. Generally the dolls are picked with some theme in mind. The themes could be Dasha avtar of Lord Vishnu, Ashta laxmi, marriage set, cricket set etc.It’s really exciting to plan and assemble these dolls. The Dolls are displayed on steps. The steps could be 5, 7, 9 in number. The ‘Pattada Bombe’ or the husband-wife dolls are the main highlight of this arrangement.These dolls are generally gifted by a mother to her daughter during her wedding.

This year, my friend Gokul and I revamped her old dolls, belonging to her mother.  Just like two little girls playing with their dolls,we enjoyed every moment draping saree and dressing them up. I also painted an old ‘Benne Krishna’ idol which my mother in law gifted me.This year the scale and size of my Bombe mane got a little bigger, thanks to my doll collection spree. I enjoyed every bit arranging them and feasting on sundal every day.

The Gujratis in our building also organised a Dandiya nite, which I happened to miss as we had planned our yearly trip to Mysore. Mysore is breathtaking during this time of the year. It’s been 3 consecutive years that we’ve been visiting Mysore for Dussera. I ‘m hoping to make this a constant affair every year.

So, this was how we celebrated Navratri and after the festival, removing all the dolls always makes me feel sad and brings a tear to my eye. On the happier note, the dussera dolls are now available in the market at a throw away price and it’s time to grab few more for next year:)..

As mentioned earlier,women invite other women to their homes and generally serve sundal and badam milk during navratri. So here’s the recipe for sundal which I tried out.

Black Chana, Moong and Peanut Sundal:

You’ll need:

Black chana: 1/2 cup

Moong: 1 cup

Peanut: 1/2 cup

Freshly grated coconut: 1/2 cup

Ginger: small piece: 1/2 inch

Green chillies: 2 nos

Corriander : 2 tablespns chopped

Curry leaves: 4-6 leaves

Red chillies dried: 2-3 nos

Oil: 1 tablespn

Mustard: 1/2  teaspn

Jeera: 1/2 teaspn

Hing: a pinch

turmeric powder: 1/2 teaspn

Salt: to taste

Lemon juice: 2 teaspns.

Procedure:

Soak black chana, moong and peanuts overnight separately. Next morning pressure cook moong and peanuts together with a pinch of salt. Take care not to over cook moong and peanuts, about 2 whistles in your pressure cooker would be sufficient. On the contrary for black chana, you’ll need some more time, mine got cooked in 4-5 whistles. Please add salt to blck chana also while cooking. Once cooked, keep aside.

Grind, coconut, ginger, green chillies, some coriander and some curry leaves together. Do not grind them into a fine paste consistency. in a wok, pour some oil, add mustard and cumin(jeera). Let them splutter, add hing, curry leaves and red chillies and let them get fried. Add the ground green chilli mix and keep frying for about 2 minutes. Add the cooked, black chana, moong, peanut, salt, turmeric and mix gently. turn off the gas and sprinkle some coriander and add some lime juice. You can also add some freshly grated coconut and sundal is ready.

This recipe of modak used to be a regular feature in our kitchen back home for Ganesh Chaturthi. I love this variation of modaks as compared to the fried version, but my husband prefers the fried ones. Now that explains why this was the first time that I tried this at my place. In Goa or I guess along the coastal belt from Maharashtra to Kerala this version of modaks or kadabu steamed in turmeric leaves is very common. They are called as ‘Patholeos’ in Goa. Hindus In Goa make them for Nag Panchami and  Christians make them for the ‘Feast of our Lady’ which falls on 15th of August which is also our Independence day.  Every Independence day used to be a festival back home and we would relish patholeos given by ours neighbors.

My friend Gokul actually has a turmeric plant in her place and I couldn’t resist my excitement at the site of those leaves. I was already imagining and drooling over the idea of making modaks as it was still Ganesh chaturthi season. She very sweetly plucked a few leaves and gave me after seeing the child like enthusiasm in me:).. I had thought that I would actually go in search for the leaves which later I got to know are generally available at any Mangalore store here in Bangalore. Thank you Gokul for the turmeric leaves:) and you made my day.

Here’s the recipe. It’s a normal steamed modak recipe which are steamed in turmeric leaves. The actual recipe of making ‘Patholeos’ is a little different and tedious, but they taste the same. The shape of patholeos is generally semicircular just like kadabus. Anyways, I got to taste some patholeos after 7 long years and they tasted heavenly:)..

Here’s the Recipe:

You’ll need:

Rice Flour: 1 cup

Water : 1-1/4 cup

salt: a pinch

Ghee: 1/2 teaspn + 2 teaspns to knead.

Turmeric leaves for Steaming: 3 leaves cut into halves( 6 pieces)

Stuffing:

Freshly grated coconut: 1 cup

Jaggery: 3/4 cup

elaichi: 1/2 teaspn

Ghee: 1/2 tablespn

Roasted sesame seeds: 2 teaspns

Roasted poppy seeds: 2 teaspns

raisins: 2 teaspns (optional)

Procedure:

Stuffing:

Mix coconut and jaggery in a bowl and leave it for sometime. The jaggery will melt and get mixed with coconut and this makes it easier to cook. In a thick bottom pan, add some ghee and add the raisins and fry them. Once the raisins are done, add coconut-jaggery mix and keep stirring till the mix starts to leave the edges and a wonderful aroma starts to emanate. Switch of the gas and add roasted sesame seeds and poppy seeds and mix well. Let this mixture cool a bit.

Dough:

In a thick bottomed pan, add the water. Add salt and 1/2 teaspn ghee to the water. let the water boil a bit and to that add the rice flour and mix well. The rice flour will start forming a dough. Switch off the gas and transfer this dough on to the clean kitchen platform or a large plate. Knead the dough by adding some more ghee little by little till it forms a very soft pliable dough. It will take quite some time and effort at this stage. Good exercise for your upper arms. If the dough is not kneaded properly then the modaks will develop cracks while steaming.

Once the dough is done, divide the dough into small lemon size balls and pat them into a circle  with the help of your fingers and your palms. This is a little difficult to roll with a pin, hence this procedure, where you make puri shape with your fingers and put the stuffing in the centre and gathers all the edges like a potli or a wonton and keep them aside. Once all the modaks are done, pour enough water in the pressure cooker and keep an elevated perforated plate or an idli plate will also do. I have used a perforated plate. Place the cut turmeric leaves onto the perforated plate. Arrange the modaks on leaves, space them out evenly as they tend to fluff a bit once they are steamed. Put the cooker lid on and pressure cook without the weight for about 10-12 minutes just like your idlis.

Modaks arranged in pressure pan for steaming.

For the kadabus or patholeos, make a puri with your fingers just like for modaks and fill the stuffing inside and  fold the circle or puri into a half or a semicircle. Seal the edges properly and place them into a turmeric leaf. You can further seal the edges of the turmeric leaf with the help of cloves or cinnamon sticks. It’s like wrapping the patholeo in the turmeric leaf. Steam them in the similar way as you would steam the modaks. The house will be filled with lovely aroma of turmeric leaves and not to forget the lovely steamed modaks and patholeos which are ready to be served…Enjoy.

Steamed Modaks find their way into the ‘Serve-it-Steamed‘ series event  hosted by Krithi’s Kitchen  and Denny’s OhTasteenSee .Thanks Krithi and Denny for this wonderful event.

My job has been keeping me extremely busy and that explains my hiatus from the blogging front. I haven’t been able to even check my blog comments or for that matter even my blog statistics which earlier I would check regularly. I just realised that I have loads of things to write about and haven’t been doing so. Finally, Today I’ve decided to atleast write something small to get going again:)…

This year too, we celebrated Krishna Janmashtami with fervor. I’m really fond of Lord Krishna and love listening to all the songs dedicated to him. After shifting to Bangalore I’ve developed a ear for ‘Dasarara Padagalu’-which are beautiful hymns written by Saint Purandaradasa dedicated to Lord Krishna. They are very simple and very soulful and I listen to them very often when I’m working or when I’m on my evening walks.

This year Janmashtami was special to me because of my dear friend Arti who gifted me a beautiful ‘Laddoo Gopal’. She even gifted a lovely dress along with jewellery for my Gopal and it was a delight dressing him up. I got a lovely ‘Mor-mukut’ or a peacock crown for him and my Gopal was all set for his birthday. Along with the many baby krishna idols that I have collected or been gifted, I also have  a cute little Bal Gopal with his cradle. This has been gifted by my aunt from Udupi. We performed the puja in the evening and placed Bal gopal in the cradle.

I made loads of savouries for him, This year I made chaklis, kodbele, tengkolal, khara poha, sweet poha and besan laddoos. We spent the whole evening in a Krishna temple near our house listening to beautiful bhajans.

I’m posting the recipe for Besan laddoo here:

You’ll need:

Besan flour: 1 cup

Powdered Sugar: 1 cup (I coarse ground the powder to get that  little crunchy feel, but you can powder it fine)

Ghee: 3/4 cup

Elaichi powder: 1/4 teaspn

Cashew, Raisin pieces: finely chopped: 1/4 cup(optional- I haven’t added any)

Procedure:

In a thick bottomed kadai, pour the ghee and besan and keep stirring till a lovely aroma stars emanating. By this time even the besan will start leaving the edges. Switch off the gas and let it cool completely.

Once this besan mix has cooled down, mix sugar and elaichi powder to form a dough like consistency. If it ends up being a little crumbly then add a little ghee spoon by spoon. Mix thoroughly and then role them into lemon size laddoos. The laddoos will be properly set after an hour or two, that is once the ghee and sugar added hardens. Very easy and simple recipe and the tastiest of all laddoos…Enjoy